A plate chiller rapidly cools hot wort, the unfermented beer, by passing it through a series of narrow channels alongside cold water. This process reduces the risk of bacterial contamination and minimizes the formation of dimethyl sulfide (DMS), an off-flavor often described as creamed corn. Brewers achieve fermentation temperatures quickly, often within minutes, which is essential for pitching yeast at its optimal range.
What is a Plate Chiller?
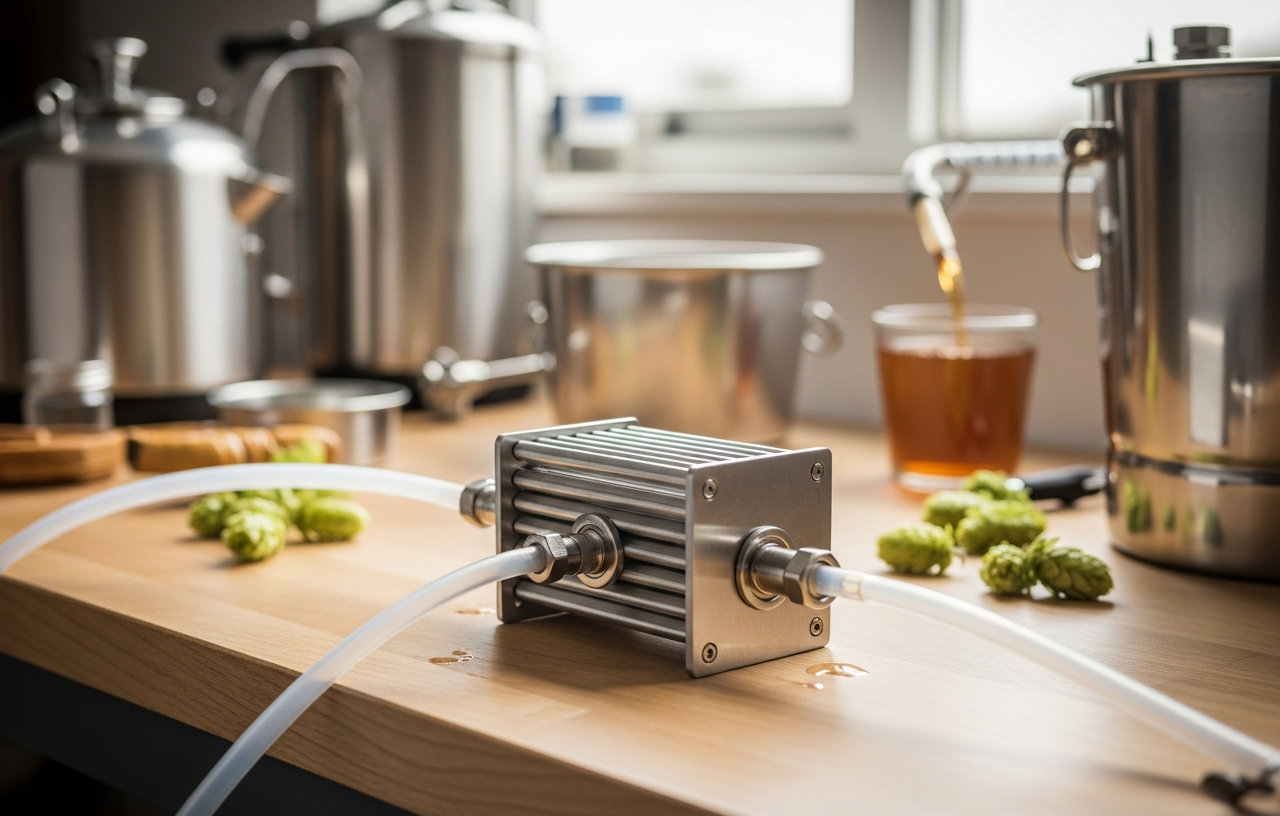
A plate chiller is a compact heat exchanger designed to transfer heat efficiently from one liquid to another. For homebrewing, it cools hot wort using cold tap water or a recirculating chilled liquid, like glycol. The device consists of multiple thin, corrugated metal plates, typically made from food-grade stainless steel (often 316L for corrosion resistance), pressed together. Gaskets or brazing seal the gaps between these plates, creating separate channels for the wort and the cooling fluid.
The design forces the two liquids to flow in opposite directions, a method known as counterflow. This counterflow arrangement maximizes the temperature difference along the entire length of the heat exchanger, leading to highly efficient heat transfer. Plate chillers are significantly smaller than immersion chillers offering comparable cooling power, making them a popular choice for brewers with limited space or those seeking faster cooling times.
How Plate Chillers Work: The Counterflow Principle
The operational efficiency of a plate chiller stems from its counterflow design. Hot wort enters one port of the chiller, flows through a series of alternating channels, and exits significantly cooler from another port. Simultaneously, cold water enters a separate port, flows through the channels adjacent to the wort, but in the opposite direction, and exits warmer.
Consider a typical plate chiller with 20 to 50 plates. Each plate adds surface area for heat exchange. As the hot wort flows, it transfers its thermal energy through the thin metal plates to the colder water on the other side. Because the coldest water meets the coolest wort and the warmest water meets the hottest wort, the temperature gradient across the plates remains high throughout the chiller. This continuous and efficient heat exchange allows a 5-gallon batch of wort at 212°F (100°C) to drop to pitching temperature (e.g., 68°F or 20°C) in just 5 to 15 minutes, depending on water temperature and flow rate.
Benefits of Using a Plate Chiller for Homebrewing
Faster Wort Cooling
The primary advantage of a plate chiller is its speed. Rapid cooling reduces the amount of time wort spends in the 'danger zone' between 140°F (60°C) and 80°F (27°C), where thermophilic bacteria can thrive and cause off-flavors. It also helps achieve a good 'cold break,' which causes proteins and tannins to coagulate and drop out of suspension, leading to clearer beer.
Improved Efficiency and Wort Quality
Efficient cooling minimizes the formation of DMS precursors. It also helps preserve volatile hop aromas that might otherwise evaporate if the wort cools too slowly. Brewers often notice a cleaner fermentation profile and clearer finished beer due to the more pronounced cold break.
Compact Size
Plate chillers are small. A unit capable of cooling a 10-gallon batch can often fit in the palm of your hand, taking up minimal storage space compared to large immersion chillers.
Drawbacks and Challenges
Cleaning Difficulty
The corrugated internal channels, while efficient for heat transfer, are difficult to clean. Hop particles, proteins, and yeast can get trapped, leading to bacterial growth. Thorough cleaning is absolutely essential. Many brewers backflush the chiller with hot water and a strong cleaning solution immediately after use, then follow with a sanitizer before the next brew day. For detailed instructions on sanitization, refer to our article on How to Sanitize Brewing Equipment for Beer.
Clogging Risk
The narrow channels are prone to clogging from hop debris, trub, or other solids. Using a hop spider, hop bag, or a whirlpool arm with a filter screen before the chiller is often necessary to prevent blockages. A clogged chiller significantly reduces flow rate and cooling efficiency, and can be frustrating to clear.
Pressure Drop
The intricate internal pathways create resistance, resulting in a pressure drop across the chiller. This means a pump is often needed to push the wort through, especially for larger systems or when trying to achieve faster flow rates. Gravity feeding is possible but typically slower.
Plate Chiller vs. Immersion Chiller
Homebrewers typically choose between plate and immersion chillers. Immersion chillers are simpler: a coiled tube is submerged directly into the hot wort. They are easier to clean and less prone to clogging because they have no internal channels. However, they are generally slower at cooling, especially for larger batches, and take up more space in the brew kettle.
Plate chillers offer superior speed and efficiency. They are more complex to clean and require a pump for optimal performance. The choice often depends on a brewer's budget, batch size, and tolerance for cleaning complexity. For a detailed comparison, see .
Setting Up Your Plate Chiller
Proper setup makes sure the chiller works effectively and safely.
- Connections: Plate chillers typically have four ports. Two are for wort (inlet and outlet), and two are for cooling water (inlet and outlet). Standard sizes include 1/2-inch NPT or garden hose connections.
- Wort Path: Connect the hot wort outlet from your kettle or pump to the wort inlet of the chiller. Then, connect the wort outlet of the chiller to your fermentation vessel.
- Cooling Water Path: Connect your cold water source (tap or recirculating pump) to the cooling water inlet. Connect the cooling water outlet to a drain or collection bucket if you plan to reuse the water for cleaning or gardening. Make sure the cooling water flows counter to the wort for maximum efficiency.
- Pump (Optional but Recommended): A robust pump is highly recommended for pushing wort through the chiller, especially for consistent flow rates and larger batches. Gravity feeding is possible but slower and less controllable.
- Temperature Control: Use a thermometer at the wort outlet to monitor the temperature and adjust the flow rate of the cooling water as needed to hit your target pitching temperature. Fermentation temperature controllers, like those discussed in Best Fermentation Temperature Controllers, can help maintain optimal conditions.
Cleaning and Sanitizing Your Plate Chiller
Cleaning a plate chiller is the most critical step to prevent infection. Follow these steps:
- Immediate Backflush: Immediately after cooling your wort, reverse the flow of hot water through the wort side of the chiller. This helps dislodge any particles.
- Cleaning Solution Recirculation: Prepare a strong cleaning solution (e.g., PBW or other alkaline brewery cleaner) according to manufacturer instructions. Pump this hot solution through both the wort and water sides of the chiller for at least 15-30 minutes, again in reverse flow for the wort side.
- Rinse Thoroughly: Rinse both sides with plenty of hot water until no cleaning solution remains.
- Sanitize: Before your next brew day, recirculate a no-rinse sanitizer, like Star San, through the wort side of the chiller for the recommended contact time. Do not rinse the sanitizer out.
- Storage: Store the chiller with sanitizer solution inside or completely dry, depending on the sanitizer type and manufacturer recommendations.
Some brewers also periodically soak their plate chiller in a stronger cleaning solution or disassemble it (if possible) for deep cleaning, though disassembly is not common for brazed models.
Maintenance and Troubleshooting
Plate chillers are generally low maintenance, but attention to detail helps extend their lifespan. Always inspect gaskets (if present) for cracks or wear. Replace them as needed to prevent leaks. If you notice a significant drop in cooling efficiency over time, it may indicate internal fouling that requires a more aggressive cleaning regimen.
In case of a clog during brewing, immediately stop the wort flow. Backflush with clean water or CO2 if available. If the clog persists, disconnecting the chiller and attempting to clear it manually with a strong flush can be necessary. Prevention through proper filtering upstream is always the best strategy.
Choosing a Plate Chiller
When selecting a plate chiller, consider several factors:
- Number of Plates: More plates generally mean more surface area for heat exchange and faster cooling. Common models range from 20 to 50 plates.
- Material: Most are stainless steel (304 or 316L). 316L offers superior corrosion resistance.
- Port Size: Ensure the port sizes match your existing brewing equipment (e.g., 1/2-inch NPT for standard homebrew pumps and tubing).
- Gasketed vs. Brazed: Brazed plate chillers have plates permanently joined, offering greater durability and preventing internal leaks. Gasketed models can be disassembled for cleaning but are less common for homebrewing.
- Manufacturer Reputation: Research from user reviews indicates certain brands offer better performance and easier cleaning protocols.
A plate chiller represents a significant upgrade for many homebrewers. It offers fast, efficient wort cooling, which improves beer quality and reduces brew day duration. While the cleaning process requires diligence, the benefits in terms of beer clarity and flavor stability make it a worthwhile investment for serious brewers.