Kegconnection Kegerator Beer Line Cleaning Kit - Easy and Safe to Use Keg Cleaner - with Brew Clean Solution and More
- This home kegerator and brewery machine cleaner kit has every tool you'll need that fit your kegs and easy.
- This keg cleaning kit has everything you need to clean your taps system. This beer line cleaner set has 8.
- Our keg line cleaning kit is very easy to use to clean your beer kegerator dispenser line. The cleaning.
- Made specially for cleaning your kegerators beer lines, this cleaning equipment and solution kit is safe.

Bar-King Beer Line Cleaner - 6 Individual Cleaning Packets
- Environmentally Friendly And Safe To Use. This Cleaning powder is non-caustic and will not burn your skin.
- No Measuring Needed! No worrying about waste with over pouring or improper mixture with these cleaning.
- Clean Lines, Clean Beer! 6 individual packets for easy and convenient cleaning between every keg.
- The 5-Star-North Promise: If for any reason you aren't completely satisfied with this beer line cleaner.

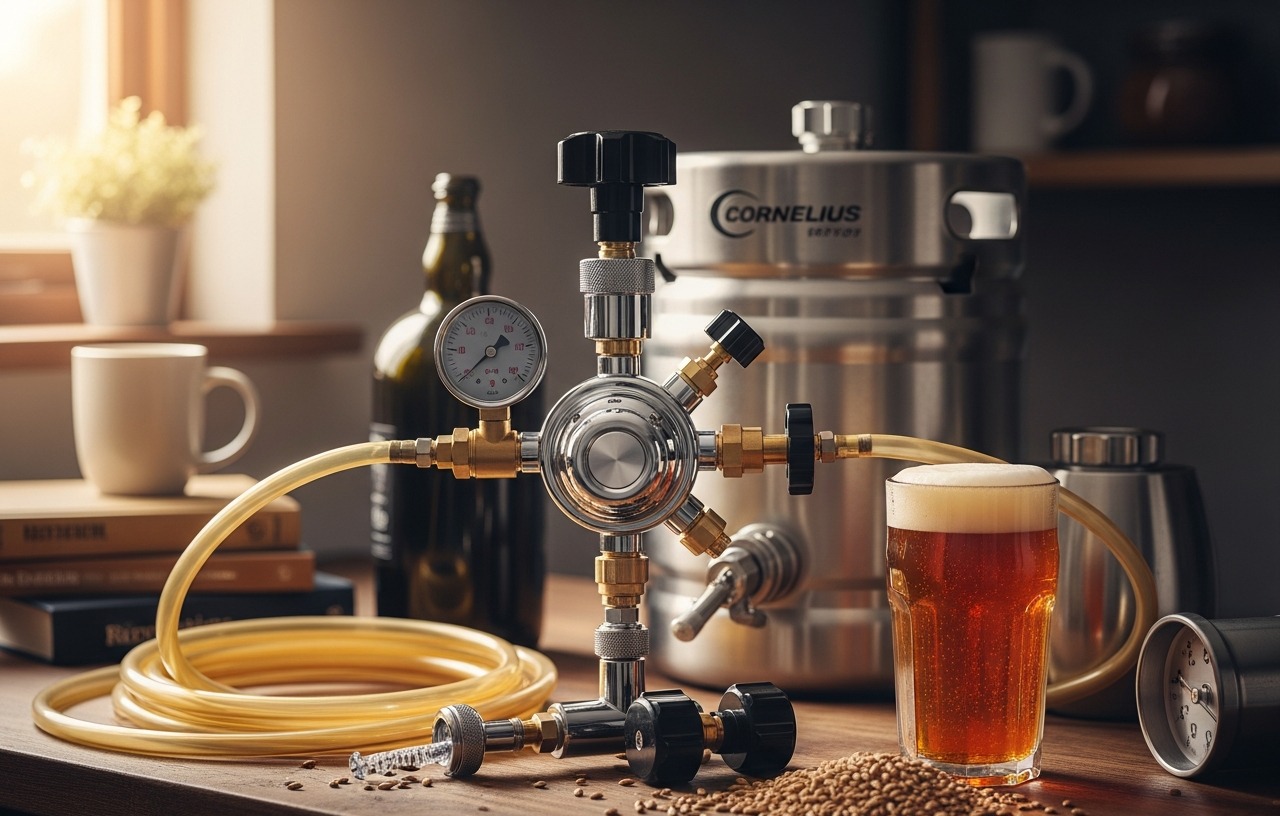
2.5 Gallon 10 L Cleaning Keg, Beer line cleaner with 2D Coupler Keg, kegerator cleaning kit Line Cleaning Kit Cleaning Keg for
- Superior Durability: This beer line cleaning keg is constructed with high-strength stainless steel.
- Universal D-Type Connections: The beer line cleaning kit includes 2 high quality D-type fittings that are.
- Optimal Capacity: With a 2.5-gallon capacity, this beer keg line cleaning kit holds ample cleaning.
- user friendly Operation: Simply fill the cleaning keg with your preferred beer line cleaner solution, swap.
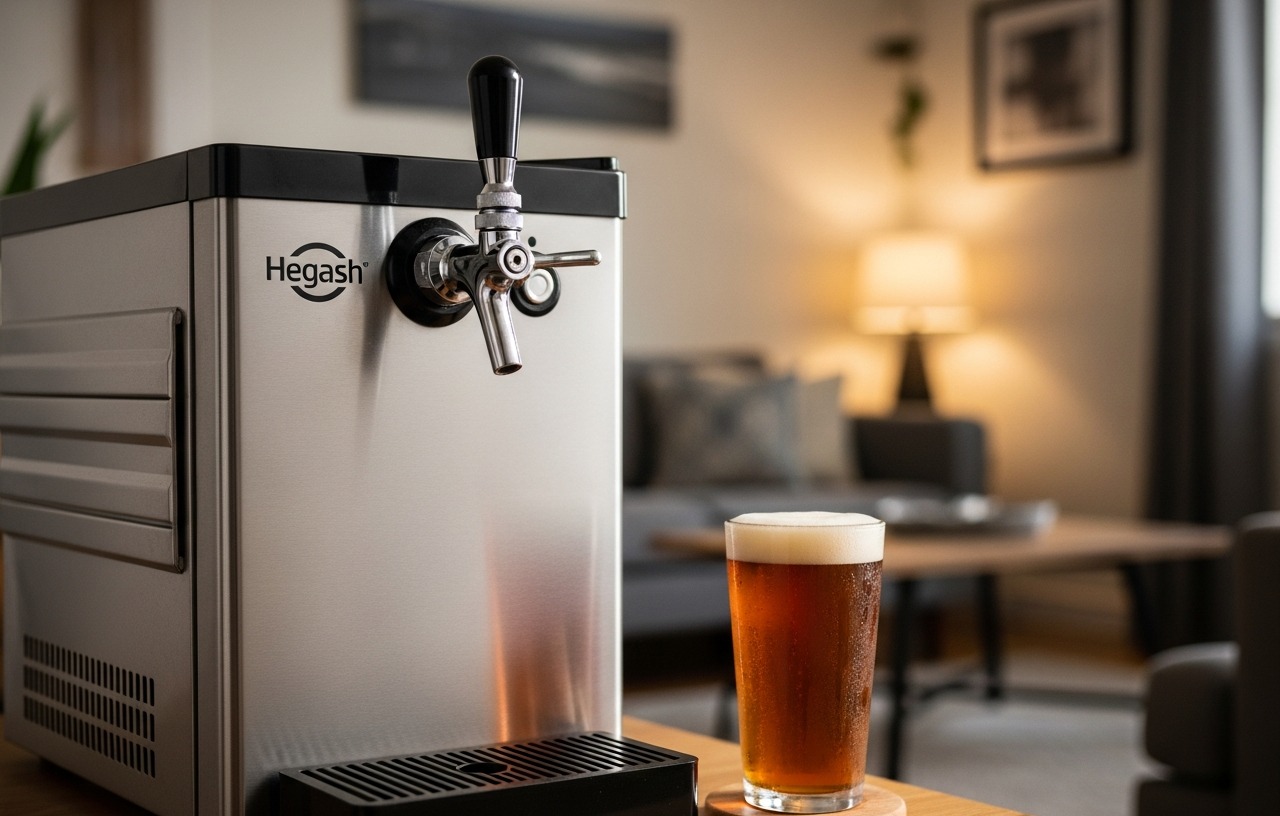
A sour taste in your homebrew, even after a fresh keg, often points to dirty beer lines. Bits of yeast, mold, and beer stone can cling to the inside of your tubing, tainting otherwise perfect pints. Regular cleaning is not just about taste. It is essential for hygiene and extending the life of your kegerator components.
Why Clean Your Kegerator Lines?
Dirty lines are a breeding ground for microorganisms. These unwanted guests can cause a range of issues, from off-flavors like sourness or butterscotch to cloudy beer and excessive foaming. Over time, beer stone, a mineral deposit, can also build up. This creates a rough surface where bacteria and yeast can easily attach and thrive. Cleaning the lines on a kegerator removes these deposits and contaminants.
Ignoring proper maintenance means your carefully brewed beer will never taste as intended. The investment in quality ingredients and fermentation equipment is wasted if the serving lines are neglected. A clean system delivers the true flavor profile of your homebrew every time.
How Often Should You Clean Kegerator Lines?
For optimal freshness and hygiene, clean your keg lines every two to four weeks, or with every keg change. If you pour less frequently, a cleaning every month is a good minimum. If you notice any off-flavors, excessive foaming, or visible residue in the lines, clean them immediately, regardless of the schedule. This proactive approach ensures your system remains pristine and your beer delicious.
Essential Supplies for Cleaning Lines in a Kegerator
Before you begin, gather the necessary tools. A proper cleaning kit makes the job much easier and more effective. You will need:
- A beer line cleaning solution (alkaline or acid based, specifically for beer lines)
- A cleaning bottle or dedicated cleaning keg
- A faucet brush
- A coupler brush
- A bucket for waste water
- Warm water
- Gloves to protect your hands from cleaning chemicals
Many homebrewers find that a complete kit simplifies the process significantly. The Kegconnection Kegerator Beer Line Cleaning Kit is a popular choice. It includes a cleaning bottle, brushes, and cleaning solution, providing everything needed to clean your taps system effectively. This kit is designed for ease of use, making the task of how to clean lines on a kegerator much simpler.
For cleaning solutions, individual packets like the Bar-King Beer Line Cleaner - 6 Individual Cleaning Packets offer convenient, pre-measured doses. These are often environmentally friendly and non-caustic. If you have a larger setup or prefer a dedicated vessel, a 2.5 Gallon 10 L Cleaning Keg can be useful. Follow these steps for a thorough cleaning:
1. Disconnect the Keg
First, turn off your CO2 supply at the regulator. Disconnect the beer line from your keg. If you are using ball lock kegs, simply pull up on the collar of the disconnect and remove it from the keg post. For commercial Sanke kegs, lift the handle on the coupler and twist to remove. Place the disconnected beer line into an empty bucket.
2. Prepare the Cleaning Solution
Mix your chosen beer line cleaner with warm water according to the manufacturer's instructions. Most solutions require a specific dilution ratio. Use a separate cleaning bottle or the dedicated cleaning keg for this step. Make sure the solution is thoroughly dissolved. Circulate the Solution Through the Lines
There are two main methods for pushing the cleaning solution through your lines:
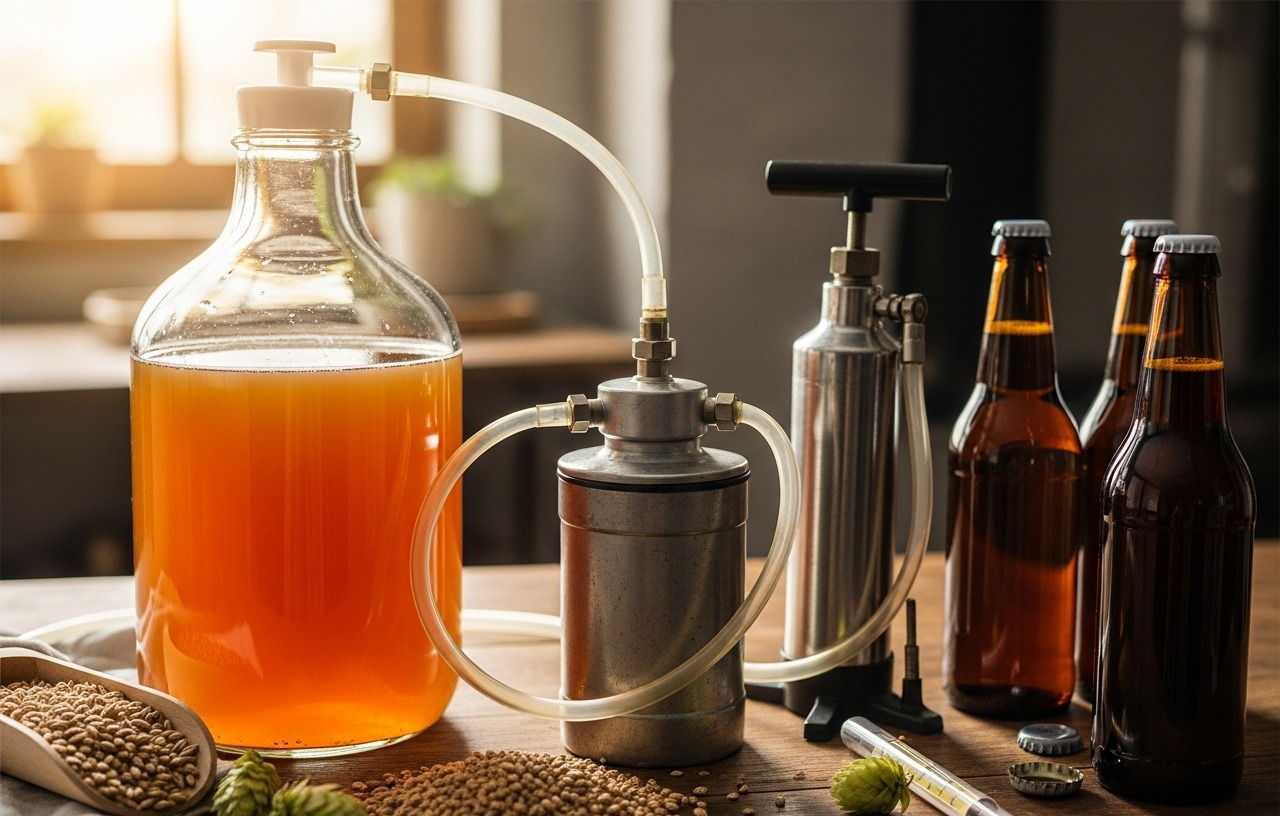
- Using a cleaning bottle with a hand pump: Attach the beer line disconnect to the fitting on your cleaning bottle. Pump the solution through the line until it exits the faucet into your waste bucket.
- Using a cleaning keg with CO2: Fill your cleaning keg with the solution. Attach your beer line to the cleaning keg's liquid out post. Connect your CO2 regulator to the gas in post on the cleaning keg. Set the CO2 pressure to 10-15 PSI. Open the faucet and let the solution flow through the beer line until it runs clear into your waste bucket.
Ensure the solution completely fills the line. This removes initial debris.
4. Soak the Lines
Once the cleaning solution has filled the lines, close the faucet. Allow the solution to sit in the lines for 15-20 minutes. For heavily soiled lines or after a long period without cleaning, you can extend the soaking time to 30 minutes. This gives the cleaning agent time to break down stubborn beer stone, yeast, and bacterial film. Some cleaning solutions, like those from Bar-King, are formulated for efficient soaking.
5. Clean the Faucet and Coupler
While the lines are soaking, disassemble your faucet and coupler. Remove the tap handle, bonnet, and lever from the faucet. Use a faucet brush to scrub the inside of the faucet body and spout. For the coupler, remove the probe and any gaskets. Use a coupler brush to clean the inside of the body and the probe. Rinse all parts thoroughly with clean water. This step is often overlooked but is important for overall system hygiene. You can find more details on cleaning solutions and sanitization methods at How to Sanitize Brewing Equipment for Beer.
6. Rinse Thoroughly
After the soaking period, open the faucet and let the remaining cleaning solution drain into your waste bucket. Then, fill your cleaning bottle or keg with fresh, clean water. Circulate this water through the lines, just as you did with the cleaning solution. Rinse until no traces of the cleaning solution remain. This usually takes several liters of water per line. You should not detect any chemical smell or taste in the rinse water.
7. Reassemble Your Kegerator
Reassemble your faucet and coupler, making sure all gaskets and O-rings are correctly seated. Reconnect the beer line to your keg. Turn on your CO2 supply. You are now ready to pour a fresh, clean pint. If you are setting up a new system or upgrading, consider reviewing Best Kegerator Conversion Kits for more information on system components.
Troubleshooting Common Kegerator Cleaning Issues
Even with regular cleaning, you might encounter issues. Addressing these problems quickly preserves your beer quality.
Persistent Off-Flavors
If your beer still tastes off after a thorough cleaning, the problem might be deeply embedded. Old beer lines can absorb flavors and become permanently tainted, especially if they are made of standard vinyl. Consider replacing your lines entirely if they are several years old or if the off-flavors persist. Another possibility is that your cleaning solution was not strong enough, or the soaking time was too short for the level of contamination. You might need a stronger alkaline cleaner or an acid-based cleaner to remove stubborn beer stone that alkaline cleaners cannot fully dissolve.
Slow Pouring or Foaming
Slow pouring or excessive foaming after cleaning often indicates a partial blockage or a dirty component. Recheck your faucet and coupler for any lingering debris. Small pieces of hops or yeast can sometimes get lodged in the faucet's restrictor plate or the coupler's probe. Disassemble and brush these parts again. Ensure your beer lines are not kinked or pinched. A clean line should allow beer to flow smoothly and consistently.
When to Replace Your Beer Lines
Beer lines do not last forever. Even with diligent cleaning, they can eventually become scratched, discolored, or permanently absorb flavors. Vinyl lines, common in home kegerators, should be replaced every 1-2 years. Braided or barrier tubing might last longer, up to 3-5 years. Replacing lines is a relatively inexpensive maintenance task. A 10-foot section of new beer line typically costs between $10 and $20. Fresh lines make a noticeable difference in beer clarity and flavor. Also, inspect all O-rings and gaskets periodically, replacing them if they show signs of wear or cracking. A set of replacement O-rings usually costs $5 to $15.
Professional Kegerator Cleaning Services
Most homebrewers can handle how to clean lines in kegerator on their own. However, if you have a complex multi-tap system, persistent issues you cannot diagnose, or simply lack the time, professional services are available. Commercial draft technicians specialize in deep cleaning and troubleshooting complex systems. A professional service call typically ranges from $100 to $250, plus the cost of any parts or extensive labor. This cost can vary based on location and the complexity of your setup. It protects your beer's quality and ensures you enjoy every drop as intended. Regular cleaning prevents off-flavors, extends equipment life, and guarantees a satisfying pour every time.
Kegconnection Kegerator Beer Line Cleaning Kit - Easy and Safe to Use Keg Cleaner - with Brew Clean Solution and More
- This home kegerator and brewery machine cleaner kit has every tool you'll need that fit your kegs and easy.
- This keg cleaning kit has everything you need to clean your taps system. This beer line cleaner set has 8.
- Our keg line cleaning kit is very easy to use to clean your beer kegerator dispenser line. The cleaning.
- Made specially for cleaning your kegerators beer lines, this cleaning equipment and solution kit is safe.
Bar-King Beer Line Cleaner - 6 Individual Cleaning Packets
- Environmentally Friendly And Safe To Use. This Cleaning powder is non-caustic and will not burn your skin.
- No Measuring Needed! No worrying about waste with over pouring or improper mixture with these cleaning.
- Clean Lines, Clean Beer! 6 individual packets for easy and convenient cleaning between every keg.
- The 5-Star-North Promise: If for any reason you aren't completely satisfied with this beer line cleaner.
2.5 Gallon 10 L Cleaning Keg, Beer line cleaner with 2D Coupler Keg, kegerator cleaning kit Line Cleaning Kit Cleaning Keg for
- Superior Durability: This beer line cleaning keg is constructed with high-strength stainless steel.
- Universal D-Type Connections: The beer line cleaning kit includes 2 high quality D-type fittings that are.
- Optimal Capacity: With a 2.5-gallon capacity, this beer keg line cleaning kit holds ample cleaning.
- user friendly Operation: Simply fill the cleaning keg with your preferred beer line cleaner solution, swap.