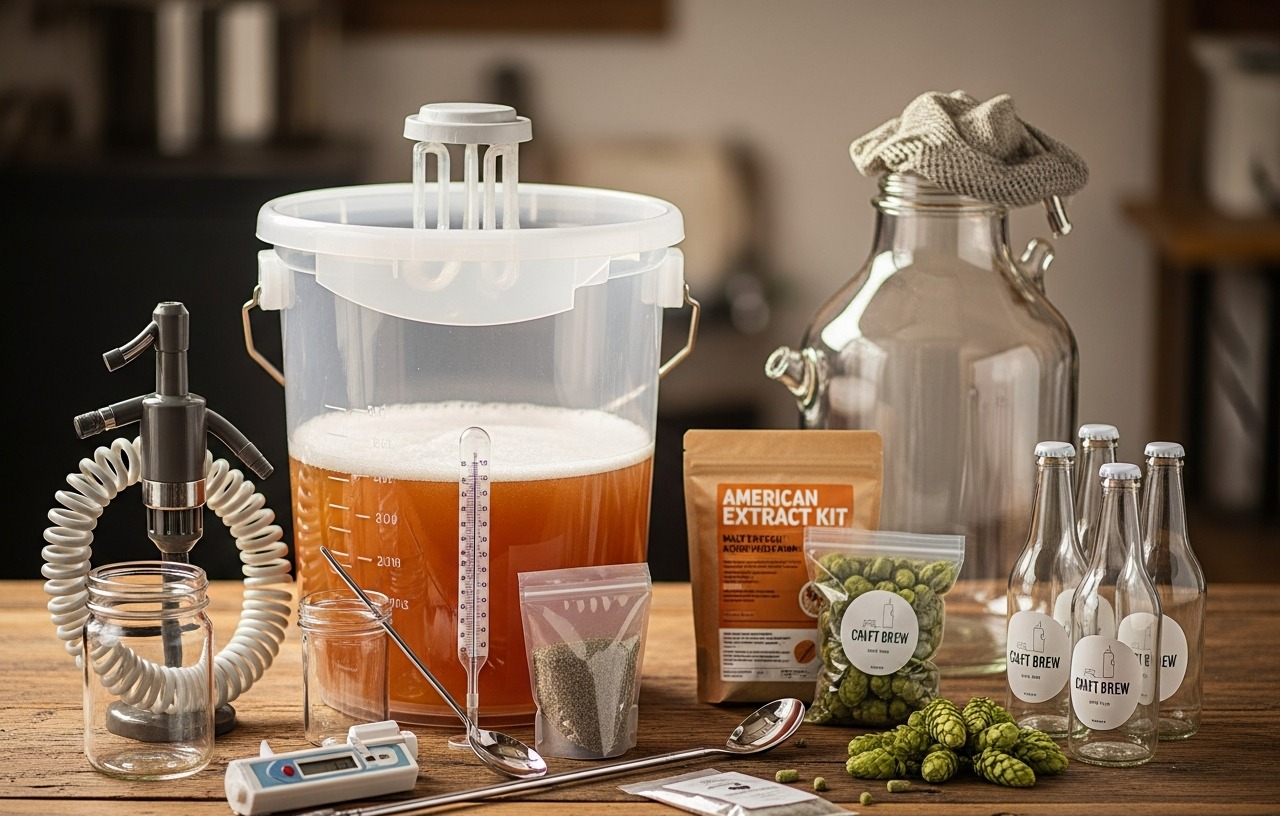
A beginner beer brewing starter kit typically includes a primary fermenter, an airlock, a bottling bucket, a bottle filler, a capper, bottle caps, a hydrometer with a test jar, an auto-siphon or racking cane, and essential cleaning and sanitizing supplies. These components provide the basic tools necessary to produce your first batch of homebrewed beer, usually a 5-gallon batch. While specific contents vary between manufacturers, these items form the foundation for a successful initial brewing experience.
Core Equipment in a Beginner Brewing Kit
Most starter kits focus on the fermentation and bottling stages of brewing, assuming the wort (unfermented beer) will be prepared using a stovetop kettle or an external brewing system. The essential items make sure proper sanitation, fermentation control, and packaging of the finished product.
Fermentation Vessel
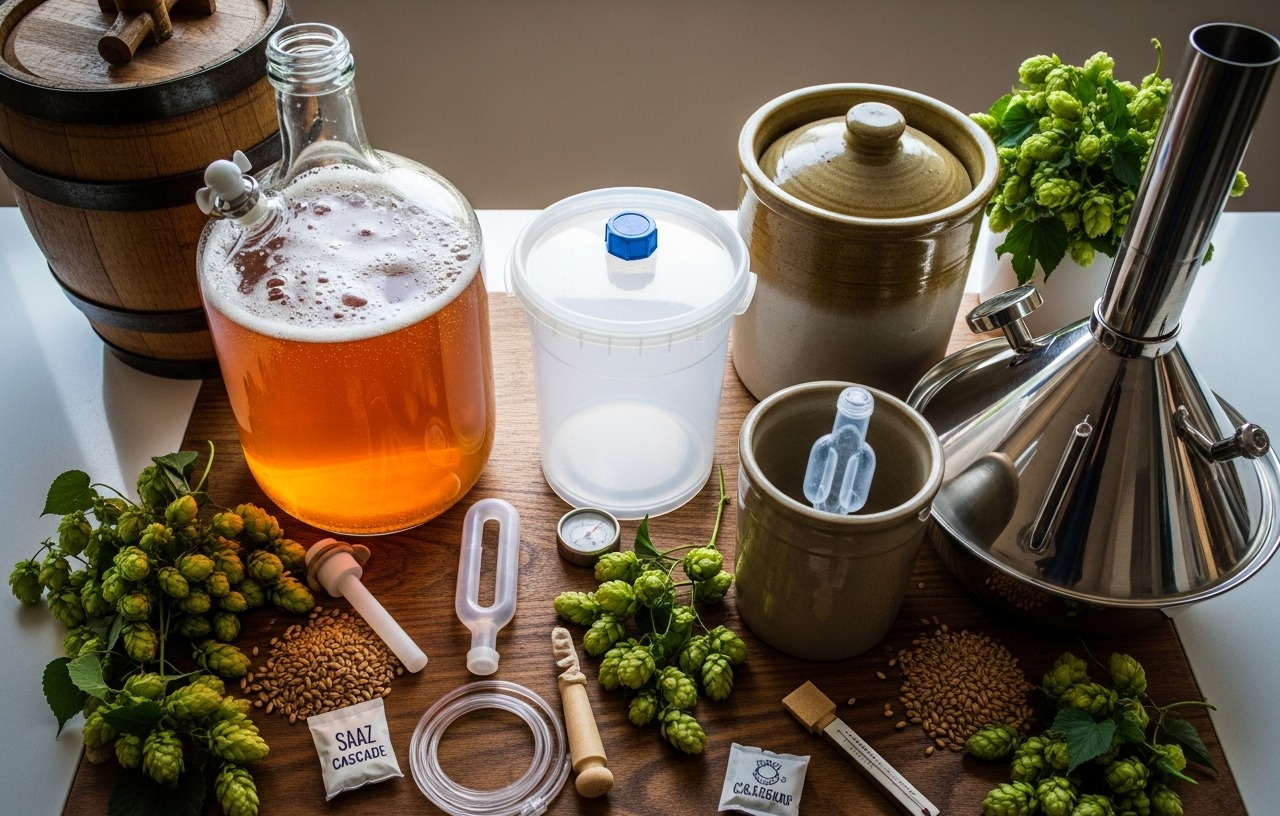
The primary fermenter is where the wort transforms into beer. Beginner kits often include a 6.5-gallon food-grade plastic bucket with a lid. This size allows for 5 gallons of wort plus headspace for krausen, the thick foam produced during active fermentation. Some kits may offer a glass carboy instead, which provides visibility of the fermentation process but is heavier and more fragile. Plastic fermenters are durable and easy to clean, making them a popular choice for beginners.
For more details on vessel options, consider exploring Best Fermentation Vessels for Beer: Glass Options Reviewed.
Airlock and Stopper
An airlock fits into a rubber stopper or grommet in the fermenter lid. Its purpose is to allow carbon dioxide (CO2) to escape during fermentation while preventing oxygen and wild yeasts or bacteria from entering. The airlock is typically filled with a sanitizing solution or clean water. Common types include S-shaped airlocks and 3-piece airlocks, both effective for maintaining an anaerobic environment.
Bottling Bucket with Spigot
After primary fermentation, the beer is transferred to a bottling bucket. This is another food-grade plastic bucket, usually 5 or 6.5 gallons, equipped with a spigot at the bottom. The spigot allows for easy, controlled transfer of beer into bottles without disturbing the sediment (trub) that collects at the bottom of the primary fermenter. Priming sugar, used for carbonation, is often mixed into the beer in this bucket before bottling.
Bottle Filler
A bottle filler is a plastic or stainless steel tube with a spring-loaded tip. It attaches to the spigot of the bottling bucket. When pressed against the bottom of a bottle, the spring-loaded valve opens, allowing beer to flow. Releasing the pressure closes the valve. This tool minimizes oxygen exposure and helps fill bottles to a consistent level, leaving appropriate headspace for carbonation.
Capper and Bottle Caps
To seal bottles, a capper and bottle caps are essential. Most kits include a wing capper, a hand-operated tool that crimps standard crown caps onto glass bottles. The caps themselves are typically oxygen-absorbing to help preserve beer freshness. This measurement indicates the sugar content and, consequently, the alcohol content. A test jar, often a tall, narrow plastic cylinder, holds a sample of the liquid for the hydrometer to float in. Taking initial (Original Gravity) and final (Final Gravity) readings helps calculate the alcohol by volume (ABV) and confirms fermentation is complete. Accuracy requires the hydrometer to float freely without touching the sides of the test jar.
Auto-Siphon or Racking Cane
An auto-siphon or a racking cane is used to transfer beer from one vessel to another, a process known as racking. This minimizes contact with oxygen and leaves behind sediment. An auto-siphon simplifies the siphoning process with a pump action. A racking cane is a simple bent tube, requiring mouth-siphoning or gravity to start the flow. Both tools are critical for transferring beer cleanly from the fermenter to the bottling bucket.
Cleaning and Sanitizing Supplies
Sanitation is critical in homebrewing. Kits always include some form of cleaning and sanitizing agent. Common sanitizers are no-rinse options like Star San or iodine-based sanitizers. A bottle brush is also frequently included for cleaning bottles. Proper cleaning removes visible debris, while sanitizing eliminates microorganisms that could spoil the beer. Without thorough sanitization, off-flavors or complete spoilage are highly likely.
For detailed instructions on cleaning, refer to How to Sanitize Brewing Equipment for Beer: Top No-Rinse Cleansers.
Brew Kettle
While not always included in every "starter kit" that focuses on fermentation and bottling, a large brew kettle (typically 5-gallon or 8-gallon capacity) is necessary for boiling the wort. Many beginners start with a large stock pot they already own. However, some more comprehensive kits do include a dedicated stainless steel brew kettle, which is an excellent addition for efficient and consistent boils.
Ingredients Kit
Most beginner kits come with an ingredient package for the first batch. This typically includes:
- Malt Extract: Often liquid malt extract (LME) or dry malt extract (DME), which provides the fermentable sugars. This simplifies the brewing process for beginners compared to all-grain brewing.
- Hops: Pellets or whole cone hops for bitterness, flavor, and aroma.
- Yeast: Usually a dry yeast strain appropriate for the beer style included.
- Priming Sugar: Dextrose (corn sugar) or sucrose (table sugar) for bottle carbonation.
The ingredient kit is designed to produce a specific style of beer, such as an American Pale Ale or an Irish Stout, providing a guided first brewing experience.
Optional but Highly Recommended Additions
While the core kit offers everything needed to brew, certain additional items significantly enhance the process and the quality of the final product. These might not be in every basic starter kit but are worthwhile purchases.
Wort Chiller
After boiling, the wort needs to be cooled rapidly to pitching temperature (typically 60-70°F or 15-21°C) before yeast is added. A wort chiller, such as an immersion chiller, speeds up this process. Rapid cooling minimizes the risk of bacterial contamination and helps create a clearer beer by promoting the cold break. A temperature controller, often paired with a heating pad and a cooling source (like a mini-fridge), maintains the wort within the optimal temperature range for the yeast strain. This prevents off-flavors caused by temperature fluctuations. Many beginners start without one, but it is a valuable upgrade.
Learn more about these devices at Best Fermentation Temperature Controllers: Keep Your Brew in the Zone.
Brewing Spoon or Stirrer
A long-handled brewing spoon or stirring paddle is helpful for mixing ingredients, especially during the boil and when adding priming sugar to the bottling bucket. Plastic or stainless steel options are common, with lengths typically ranging from 18 to 24 inches to reach the bottom of large kettles and fermenters.
How the Kit Components Work Together
The brewing process begins with preparing the wort, often involving boiling malt extract and hops in a brew kettle. Once cooled, this wort is transferred to the primary fermenter, where yeast is added. The airlock and stopper maintain an anaerobic environment during fermentation, which typically lasts 1-2 weeks. The hydrometer tracks fermentation progress.
After fermentation, the auto-siphon or racking cane transfers the beer to the bottling bucket. Priming sugar is added and gently mixed. Finally, the bottle filler, capper, and caps are used to package the beer into individual bottles, where a secondary fermentation creates natural carbonation. Throughout this entire process, rigorous cleaning and sanitization of all equipment are essential to prevent infection and make sure a quality product.
Cost Considerations for Beginner Kits
The cost of a beginner beer brewing starter kit can vary significantly based on its contents and the quality of the materials. More comprehensive kits that include a brew kettle, glass carboys, or even a wort chiller can cost between $200 and $350. These prices generally do not include the cost of bottles, which can be purchased separately or sourced from recycled commercial beer bottles. Ingredient kits usually add another $30-$50 per batch.
Maintaining Your Brewing Equipment
Proper care extends the life of your brewing equipment and prevents future brewing issues. Always clean and sanitize equipment immediately after use. Plastic components, like fermenters and bottling buckets, can scratch easily, creating hiding spots for bacteria. Use soft brushes and non-abrasive cleaners. Store equipment dry and away from direct sunlight to prevent degradation. Regularly inspect rubber stoppers, gaskets, and tubing for cracks or wear, replacing them as needed to maintain airtight seals and prevent contamination.
Understanding the components of a beginner beer brewing starter kit empowers new brewers to approach their first batch with knowledge and confidence. Each tool serves a specific purpose, contributing to the transformation of simple ingredients into a delicious homemade beverage.