
Nate's California Honey - 32 oz. Squeeze Bottle
- Nature Nate's 100% Pure California Raw & Unfiltered Honey is a naturally delicious sweetener, harvested.
- Packaged in a 32-oz. bottle, our California honey pairs nicely with granola, yogurt, coffee, tea, and any.
- Every bottle of Nature Nate's raw, local honey has a purity guarantee to uphold strict testing standards.
- Our raw & unfiltered California honey blend is crafted for exceptional taste

Fischer’s 100% Pure, Raw & Unfiltered Honey to All-Natural Sweetener to Rich Flavor Profile, Packed with Nutrients, 40 oz (Pack of
- The information below is per-pack only
- Family Established Since 1935 to Founded in 1935, we are the largest and oldest raw honey processing and.
- 100% Pure & Unprocessed to We produce 100% raw honey, unfiltered and unpasteurized. We offer completely.
- 100% Responsibly Sourced Honey to Our raw honey is sourced from trusted beekeepers we know personally who.

Red Star Premier Blanc Wine Yeast, 5 g, (Pack of 11)
- 5 gram package
- Active dry wine yeast
- Recommended for cabernet, cider, dry whites, fruits, meads, port, and sodas
- Country of origin: Belgium
The rich, sweet aroma of honey fermenting into a golden elixir defines the beginning of a mead batch. This ancient beverage, often called honey wine, provides a deeply rewarding brewing experience for home enthusiasts. Making mead requires patience and attention to detail, but the process is surprisingly simple with the right tools and understanding.
Many first-time brewers begin with a simple recipe, often referred to as a 'traditional' mead. This uses only honey, water, and yeast, allowing the unique character of the honey to shine through. As you gain experience, you can experiment with fruits, spices, and other flavorings to create various styles of mead.
Essential Equipment for Mead Making
Before you begin brewing, gather all necessary equipment. Having everything sanitized and ready will make the process smoother and help prevent contamination, which is vital for any fermentation project.
Basic Brewing Gear
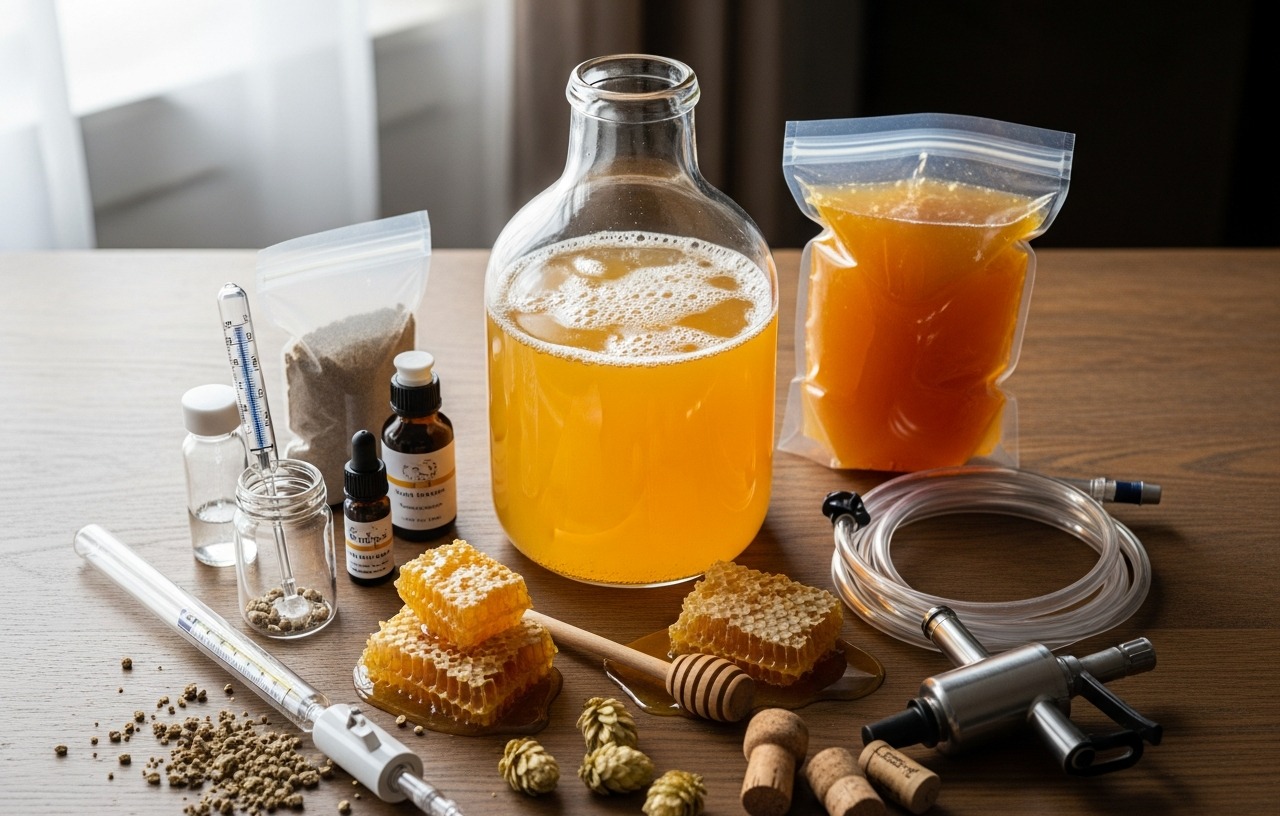
- Primary Fermentation Vessel: A 1-gallon glass carboy or a food-grade plastic bucket with a lid. For larger batches, a 5-gallon carboy or bucket works well. You can find excellent options, including glass carboys, described in our Best Fermentation Vessels for Beer: Glass Options Reviewed article.
- Airlock and Stopper: These create a one-way valve, allowing CO2 to escape without letting airborne contaminants enter.
- Hydrometer and Test Jar: Used to measure the specific gravity of your must (unfermented mead) and finished mead. This helps calculate alcohol content.
- Thermometer: Essential for monitoring the temperature of your must, especially when dissolving honey.
- Sanitizing Solution: An absolute necessity. Star San or PBW are popular no-rinse options. Learn more about proper sanitization in our guide, How to Sanitize Brewing Equipment for Beer: Top No-Rinse Cleansers.
- Large Pot (2-gallon minimum): For heating water and dissolving honey.
- Long Stirring Spoon: A food-grade plastic or stainless steel spoon for mixing.
- Siphon or Auto-siphon: For transferring mead between vessels without disturbing sediment.
- Bottling Bucket with Spigot: Makes bottling much easier.
- Bottles: Swing-top bottles or standard beer bottles (brown glass is best to protect from light).
- Capper and Caps (if using standard bottles) or Corker and Corks (for wine bottles): For sealing your finished mead.
Many beginners opt for mead making kits, which bundle most of these items. You can explore some options in our review.
Ingredients for a 1-Gallon Batch of Traditional Mead
The beauty of mead lies in its simplicity. Only a few core ingredients are needed to create this delightful beverage.
- Honey (2.5 to 3 lbs): The primary ingredient. The type of honey significantly impacts the final flavor. Lighter honeys like clover or orange blossom produce a delicate mead, while darker honeys such as buckwheat or wildflower create a more robust profile. For a consistent and high quality base, consider Nate's California Honey - 32 oz. Squeeze Bottle. This 100% pure, raw, and unfiltered honey offers a naturally delicious sweetness. Another excellent choice is Fischer's 100% Pure, Raw & Unfiltered Honey, which has been a family staple since 1935 and is known for its rich flavor profile.
- Water (approx. 1 gallon total): Use good quality water. Filtered tap water or spring water works well. Avoid distilled water, as it lacks minerals necessary for yeast health.
- Yeast (1 packet): Wine yeast is preferred for mead, as it tolerates higher alcohol levels and ferments cleanly. Red Star Premier Blanc Wine Yeast, available in 5g packets, is a highly recommended choice for meads, ciders, and dry whites due to its reliable fermentation and clean flavor profile.
- Yeast Nutrient (e.g., Fermaid O, Fermaid K, DAP): Honey lacks many of the nutrients yeast needs for a healthy fermentation. Yeast nutrient ensures a strong, complete fermentation and helps prevent off-flavors. Follow manufacturer recommendations for dosage.
- Yeast Energizer (optional): Can be used in conjunction with nutrient for an even more robust fermentation, especially with high-gravity musts.
step by step Guide to Making Mead
This process outlines making a traditional mead. The total time for active work is usually 1-2 hours, followed by weeks or months of fermentation and aging.
Step 1: Sanitize All Equipment (30 minutes)
This is the single most important step in brewing. Contamination by wild yeasts or bacteria can ruin your batch, leading to off-flavors or even a spoiled product. Use a no-rinse sanitizer like Star San. Mix it according to the manufacturer's instructions in a bucket or spray bottle. Submerge or thoroughly spray every piece of equipment that will touch your mead: the primary fermenter, lid, airlock, stopper, stirring spoon, hydrometer, test jar, and siphon. Let them sit for the recommended contact time, usually 1-2 minutes, then allow them to air dry. Do not rinse after sanitizing with a no-rinse solution.
Step 2: Prepare the Must (30 minutes)
Pour your honey into the large pot. Add about half a gallon of water. Gently heat the mixture over medium-low heat, stirring constantly, until the honey is fully dissolved. Do not boil the mixture, as excessive heat can drive off delicate honey aromatics. Aim for a temperature around 150-160°F (65-71°C). Once dissolved, remove from heat. Add the remaining water to bring the volume close to one gallon. This also helps cool the must.
Once the must is cool enough to handle, transfer it to your sanitized primary fermentation vessel. Ensure the temperature is between 60-75°F (15-24°C) before pitching yeast. This temperature range is ideal for most wine yeasts. Use your sanitized hydrometer to take an initial specific gravity reading.
Step 3: Hydrate and Pitch the Yeast (15 minutes)
While the must cools, prepare your yeast. Rehydrating dry yeast properly helps ensure a healthy start to fermentation. Boil a small amount of water (about 1/2 cup) and let it cool to 95-105°F (35-40°C). Pour the water into a sanitized cup, then sprinkle the yeast packet over the surface. Let it sit for 15-20 minutes without stirring. The yeast will rehydrate naturally. After this period, gently stir the yeast mixture. Slowly add small amounts of the must to the rehydrated yeast over 5-10 minutes to acclimate the yeast to the must's sugar concentration and temperature. This process is called tempering. Finally, pour the tempered yeast directly into the primary fermenter.
Add your yeast nutrient and energizer at this stage, following the product's instructions. Secure the lid or stopper onto the fermenter, ensuring a tight seal. Insert the sanitized airlock, partially filled with sanitized water or vodka, into the stopper.
Step 4: Primary Fermentation (2-4 weeks)
Place your fermenter in a cool, dark place where the temperature remains stable, ideally between 60-70°F (15-21°C). Consistent temperature control is important for clean fermentation. Devices like those reviewed in Best Fermentation Temperature Controllers: Keep Your Brew in the Zone can help maintain this range. Within 24-48 hours, you should see activity in the airlock, indicating fermentation has begun. This is a sign that the yeast is actively consuming sugars and producing CO2 and alcohol.
Allow the mead to ferment undisturbed for 2-4 weeks, or until bubbling in the airlock slows significantly or stops. You can take a specific gravity reading with your hydrometer. If the reading is stable for a few days (e.g., 1.000 to 1.005), primary fermentation is likely complete.
Step 5: Secondary Fermentation (1-3 months, optional but recommended)
Once primary fermentation finishes, it is beneficial to transfer the mead to a secondary fermenter. This process, known as racking, separates the mead from the thick layer of spent yeast (lees) at the bottom of the primary fermenter. Removing the lees helps prevent off-flavors from yeast autolysis (yeast breaking down) and allows the mead to clarify.
Sanitize a second carboy or fermenter, along with your siphon. Carefully siphon the mead from the primary fermenter into the secondary, leaving the lees behind. Avoid splashing the mead during transfer, as this can introduce oxygen, which is detrimental to fermented products. Seal the secondary fermenter with an airlock and stopper. Allow the mead to condition and clarify for 1-3 months. The mead will become clearer as more suspended particles settle out.
Step 6: Aging (3-12 months or longer)
Mead benefits greatly from aging. While some meads are enjoyable young, most improve significantly with time. The flavors mellow, meld, and become more complex. After secondary fermentation, you can continue aging in the secondary vessel or transfer to a clean, sanitized vessel for bulk aging. Store the mead in a cool, dark place away from temperature fluctuations. Patience is key here. Many mead makers find their mead truly shines after 6-12 months, or even several years for stronger batches.
Step 7: Bottling (1-2 hours)
When your mead has aged to your liking and is clear, it is time to bottle. Sanitize all bottles, caps/corks, the bottling bucket, and the siphon. If you plan to carbonate your mead, add a small amount of priming sugar (dextrose or corn sugar) to the bottling bucket before siphoning the mead. For still mead, omit this step.
Carefully siphon the aged mead from the fermenter into the sanitized bottling bucket. Use the spigot on the bottling bucket to fill each bottle, leaving about 1 inch of headspace. Cap or cork the bottles immediately. Store the bottled mead in a cool, dark place. If you primed for carbonation, allow 2-4 weeks for carbonation to develop in the bottles.
Tips for Success in Mead Making
- Temperature Control: Maintain consistent fermentation temperatures. Wild temperature swings can stress yeast, leading to off-flavors.
- Sanitation: Reiterate this point. It cannot be overstated. A clean brewing environment is your best defense against spoilage.
- Patience: Mead takes time. Resist the urge to bottle or drink it too early. The rewards of aging are substantial.
- Take Good Notes: Record your recipe, specific gravity readings, fermentation temperatures, and any observations. This helps you replicate successful batches and troubleshoot issues.
- Taste Along the Way: After primary fermentation, and before bottling, take small samples to monitor flavor development.
Making mead at home is a journey into ancient brewing traditions, yielding a unique and customizable beverage. With careful attention to sanitation and the steps outlined, you can produce delicious honey wine that reflects your personal taste. Enjoy the process of creating your own liquid gold.
Nate's California Honey - 32 oz. Squeeze Bottle
- Nature Nate's 100% Pure California Raw & Unfiltered Honey is a naturally delicious sweetener, harvested.
- Packaged in a 32-oz. bottle, our California honey pairs nicely with granola, yogurt, coffee, tea, and any.
- Every bottle of Nature Nate's raw, local honey has a purity guarantee to uphold strict testing standards.
- Our raw & unfiltered California honey blend is crafted for exceptional taste
Fischer’s 100% Pure, Raw & Unfiltered Honey to All-Natural Sweetener to Rich Flavor Profile, Packed with Nutrients, 40 oz (Pack of
- The information below is per-pack only
- Family Established Since 1935 to Founded in 1935, we are the largest and oldest raw honey processing and.
- 100% Pure & Unprocessed to We produce 100% raw honey, unfiltered and unpasteurized. We offer completely.
- 100% Responsibly Sourced Honey to Our raw honey is sourced from trusted beekeepers we know personally who.
Red Star Premier Blanc Wine Yeast, 5 g, (Pack of 11)
- 5 gram package
- Active dry wine yeast
- Recommended for cabernet, cider, dry whites, fruits, meads, port, and sodas
- Country of origin: Belgium